Posted by Buffalo Games on May 5th 2022
How to Frame a Puzzle
You did it! You finished the puzzle you've spent hours working on. Now what? Should you tear it apart and stuff it back in the box to complete again another day? While that sounds like fun for some people, not everyone shares this sentiment. Many puzzle lovers can't bear the thought of destroying all their hard work.
If that sounds like you, you should consider preserving and framing your newly-completed puzzle. There are a few different ways to frame jigsaw puzzles, but the simplest and most straightforward method of preserving and framing is outlined below.
Gather the Necessary Materials
Before you can start framing your latest achievement, you'll need to gather all of the right materials. To execute a successful puzzle framing, you'll need:
- A rolling pin
- Wax paper
- Scissors
- A soft washcloth or microfiber cloth
- Puzzle glue or adhesive sheets
- A paintbrush, sponge, or spreader tool
- Backing material such as cardboard, foam board, or more wax paper
- A frame that is the correct size
Gathering everything you need beforehand allows you to streamline the process and ensures you won't have to stop and rush out to your local puzzles store for a last-minute purchase.
Flatten the Completed Puzzle
Once you have all of your materials ready, it's time to start prepping your puzzle. First, you should take the time to effectively flatten the completed puzzle.
Take a rolling pin and gently — yet firmly — roll it across the surface of the puzzle to flatten it out and strengthen the bonds between pieces. Roll from one edge of the puzzle to the opposite edge and repeat the process until the entire puzzle is completed, making sure you don't miss any pieces.
This process ensures there are no pieces sticking out or unsightly bumps and bulges in the final product. After all, one small blemish can tarnish an entire 1000-piece puzzle.
Ensure the Surface Is Clean
Next, you should clear any dirt or debris from the surface of the puzzle. It's easy to miss all of the gunk that builds up while you're still working on the puzzle. But after it's finished, a quick swipe across the surface with a microfiber cloth can wipe away all of the puzzle dust, hair, crumbs, and dirt that accumulated during the building process.
Many people overlook this step, but it's a crucial part of creating a beautiful final product that you'll actually want to look at. If you don't clean the surface of the puzzle, all of the stuff sitting on top will get trapped under the layer of adhesive you're about to apply, forever bonding it to the puzzle.
These blemishes will only become more noticeable once the adhesive dries, and by that point, there's nothing you can do to fix it. So whether you're framing a 300-piece puzzle or a 2000-piece puzzle, take the extra couple of minutes to ensure that every inch of your puzzle's surface is clean.
Apply Adhesive
Now that your puzzle has been prepped, you can apply adhesive to hold it together. There are two main types of adhesive you can choose from, liquid glue and adhesive sheets.
There are dozens of specialized puzzle glues on the market, but Modge Podge is the go-to adhesive for many puzzle lovers. It is cheap, versatile, and comes in two different finishes — matte and glossy.
If you choose to use liquid adhesive, you should carefully slide a large piece of wax paper underneath the entire puzzle before applying any adhesive. This backing is done to protect your table in the event the glue seeps through the cracks in the puzzle and dries to the surface underneath.
Wax paper can easily be peeled off, whereas your nice wooden table could see serious damage.
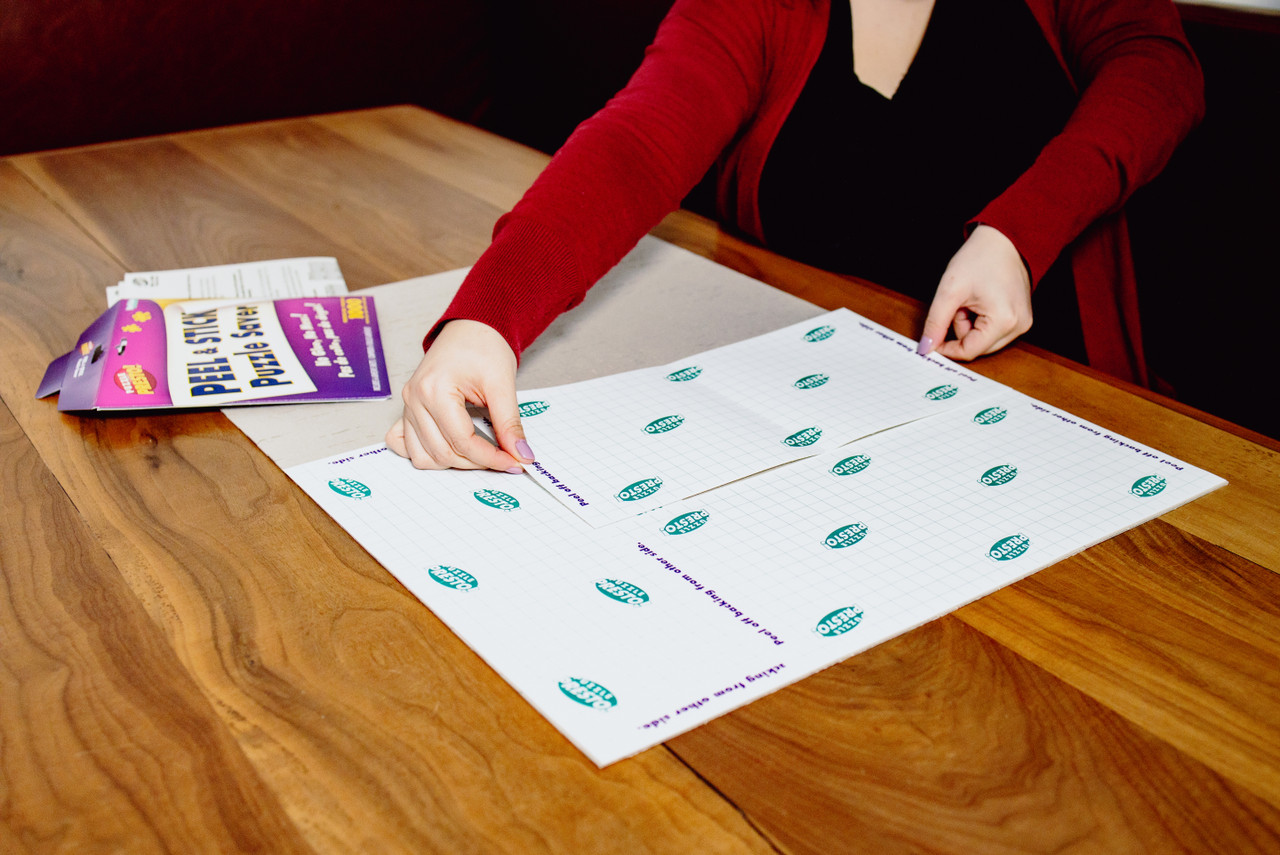
On the other hand, if you choose to use adhesive sheets, you should sandwich your puzzle between two pieces of cardboard or poster board and carefully flip the puzzle to expose the bottom side.
From here, you can apply the adhesive sheets across the back of the puzzle, covering the entire surface. This process can be especially tricky for 1,000-piece puzzles and those that are even bigger, which is why most people stick to the liquid adhesive.
If you use adhesive sheets, skip the next step and continue directly to mounting.
Let the Puzzle Air Dry
This step is the easiest step of all. Just sit back and relax while you wait for the puzzle to dry. The exact length of time it takes to dry will depend on how big the puzzle is and how much adhesive you used. 1,000-piece jigsaw puzzles are going to take a lot longer to dry than puzzles with just 48 pieces.
No matter how big the puzzle is, it's important to be patient and wait for it to dry completely before moving on to the next step. Otherwise, you run the risk of jigsaw puzzles falling apart when you go to move them. As it dries, keep an eye on it for signs of curling.
How to Fix Curling
If you notice your puzzle curling, don't panic. Continue to wait for the puzzle to finish drying, and then carefully flip it over onto the reverse side. Reapply the adhesive to the reverse side, paying special attention to any curling areas, and let it dry completely.
Curling is most often seen along the edges of jigsaw puzzles but can be seen anywhere the puzzle gets a little too wet.
Carefully Mount and Frame the Puzzle
Once the puzzle is completely dry, it's time to mount and frame it. Get whatever material you're using to mount it, whether it's wax paper, cardboard, or foam board, and cut it to fit your puzzle.
Then, carefully glue the puzzle to the backing material and press down firmly to ensure it properly bonds to the backing. Wait for it to dry and then frame it just like you would any other picture.
Consider purchasing a shadow box for thick jigsaw puzzles or if you plan on using a thick backing material. Once it's framed, all that's left to do is show off your homemade masterpiece any way you see fit.
